The Complete Guide to Custom Silicone Molds: From Design Brief to Mass Production
\r
Custom silicone molds are the single highest-leverage product investment for baking brands, Amazon private-label sellers, and specialty food producers looking to differentiate in a crowded market. A proprietary mold shape creates a product that competitors cannot replicate without your tooling \u2014 transforming a commodity purchase into a branded asset with defensible margins.\r
\r
This pillar guide covers the entire custom silicone mold journey: design principles, material selection, production methods, ordering logistics, quality control, and long-term partnership management. Whether you are commissioning your first custom mold or scaling an existing line to 50+ SKUs, this is the reference document for every decision along the way.\r
\r
Key Takeaways:\r
\r
- Custom silicone molds require $500\u2013$3,000 tooling investment per design, amortized over 3,000\u2013100,000+ unit production runs
\r
- Platinum-cured food-grade silicone (40\u201360 Shore A) is the standard for baking applications; always verify LFGB + FDA certification
\r
- Design for manufacturability (DFM) review before tooling saves 2\u20134 weeks of revision cycles
\r
- Total timeline from design brief to warehouse delivery: 60\u201385 days (including sea freight to Europe)
\r
- IP protection (NNN agreement + tooling ownership clause + design registration) is non-negotiable
\r
\r
What Types of Custom Silicone Molds Can Be Manufactured?
\r
Silicone compression molding accommodates an extremely wide range of geometries, sizes, and applications. Understanding what is manufacturable helps you scope your project realistically during the design phase.\r
\r
Common custom mold categories:\r
\r
\r
\r
| Category | \r
Examples | \r
Typical Size | \r
Complexity | \r
\r
\r
\r
\r
| Baking molds | \r
Cake pans, muffin trays, loaf molds, bundt shapes | \r
10\u201340cm | \r
Low\u2013Medium | \r
\r
\r
| Chocolate & confectionery | \r
Bar molds, praline shapes, lollipop molds | \r
5\u201325cm | \r
Medium\u2013High (fine detail) | \r
\r
\r
| Ice cream & frozen | \r
Popsicle molds, ice cube trays, gelato forms | \r
5\u201320cm | \r
Low\u2013Medium | \r
\r
\r
| Novelty & seasonal | \r
Halloween, Christmas, wedding, character shapes | \r
5\u201330cm | \r
Medium\u2013High | \r
\r
\r
| Industrial/commercial | \r
Multi-cavity production trays, conveyor belt molds | \r
30\u201360cm | \r
High (tolerances) | \r
\r
\r
| Non-food (crossover) | \r
Soap molds, candle molds, resin craft molds | \r
5\u201330cm | \r
Low\u2013High | \r
\r
\r
\r
For chocolate-specific mold design \u2014 including polycarbonate vs silicone selection, bar/tablet/praline shapes, and seasonal ordering calendars \u2014 see our dedicated guide on
custom chocolate molds wholesale.\r
\r
Manufacturing constraints to design within:\r
\r
- Minimum wall thickness: 1.5mm (structural integrity); 2.5mm+ recommended for commercial use
\r
- Draft angle: 3\u20135\u00b0 minimum on vertical walls for clean demolding
\r
- Undercuts: Avoid or minimize; silicone flex allows slight undercuts (up to 1mm) but they reduce tool life
\r
- Fine detail: Minimum feature size 0.8mm depth for reliable reproduction; text/logo embossing minimum 1mm height
\r
- Maximum single-piece size: Approximately 60\u00d760cm (limited by press platen size)
\r
- Cavity count: Multi-cavity molds (6, 12, 24, 48 cavities) increase output per cycle but raise tooling cost proportionally
\r
\r
How Do You Design a Custom Silicone Mold for Production?
\r
The design phase determines 80% of your project\u2019s success. A well-engineered design produces cleanly on the first tooling attempt; a poorly considered one requires 3\u20134 revision rounds, adding weeks and hundreds of dollars in resampling costs.\r
\r
Step-by-step design process:\r
\r
- Define the application \u2014 What will the mold produce? What temperatures will it encounter? How many cycles per day in commercial use? What release method (hand pop, mechanical eject, inversion)?
\r
- Establish dimensions and tolerances \u2014 Final product dimensions \u00b1 0.5mm for standard baking molds; \u00b1 0.2mm for precision chocolate work. Account for silicone shrinkage (2\u20133% post-cure).
\r
- Select material grade \u2014 Durometer (hardness), curing method, color, and certification requirements. See Material Selection section below.
\r
- Create 3D model \u2014 CAD software (SolidWorks, Fusion 360, Rhino) producing STEP or IGS files. Include draft angles, fillets (R0.5mm minimum on internal corners), and wall thickness uniformity.
\r
- DFM review \u2014 Factory engineers analyze for: uniform wall thickness (prevents uneven curing), adequate draft (prevents tearing), no trapped air pockets, gate location, and parting line placement.
\r
- Prototype validation \u2014 3D-printed prototype (for shape verification) followed by a silicone sample from soft tooling or CNC aluminum mold.
\r
\r
Common design mistakes:\r
\r
- Zero draft angle on vertical walls \u2192 mold sticks, tears during demolding
\r
- Variable wall thickness (1mm next to 5mm) \u2192 uneven curing, weak spots, warping
\r
- Sharp internal corners (R0) \u2192 stress concentration, cracking after 100\u2013200 cycles
\r
- Text/logo too small (<0.8mm depth) \u2192 fills with residue, unreadable after use
\r
- Ignoring shrinkage \u2192 final product 2\u20133% smaller than CAD model
\r
\r
For the complete technical walkthrough of how designs become finished products, see our detailed guide on the
7-step silicone mold manufacturing process.\r
Design File Requirements: What to Send Your Manufacturer
\r
Submitting production-ready files the first time eliminates 1\u20132 revision rounds and accelerates tooling by 5\u20137 days. Here is exactly what a factory needs:\r
\r
Accepted file formats (in order of preference):\r
\r
- STEP (.stp/.step) \u2014 Industry-standard solid model; preserves exact geometry and tolerances. Preferred by CNC programmers.
\r
- IGES (.igs/.iges) \u2014 Surface model; acceptable for simpler geometries but may lose solid-body information.
\r
- 3D PDF \u2014 Useful for visual review and annotation, but not machinable. Send alongside STEP.
\r
- AI/EPS (2D) \u2014 For flat profile molds (cookie cutters, gaskets). Must include exact dimensions, not just visual outline.
\r
\r
What to include in your submission package:\r
\r
- 3D model file (STEP) with all features at final dimensions (pre-shrinkage \u2014 the factory applies 2\u20133% scaling)
\r
- 2D drawing (PDF) with critical dimensions annotated, tolerance callouts (\u00b10.5mm standard), and surface finish notes
\r
- Material specification: durometer, curing method, color (Pantone code), certification requirement
\r
- Quantity target and packaging specification
\r
- Reference photos or sketches showing intended use (helps engineers identify stress points)
\r
\r
Top 5 file errors that delay projects:\r
\r
- Sending STL (mesh) files instead of STEP \u2014 STL loses parametric data and cannot be machined directly
\r
- No wall thickness specified \u2014 factory guesses, resulting in over-engineering or fragility
\r
- Missing draft angles \u2014 engineer must add them, changing your intended geometry
\r
- Dimensions in inches without noting the unit \u2014 Chinese factories default to millimeters
\r
- Logo/text as raster image instead of vector \u2014 cannot be engraved at production resolution
\r
\r
What Material Specifications Should You Specify?
\r
Material selection is the most consequential technical decision in a custom mold project. It determines food safety, durability, flexibility, temperature resistance, and certification eligibility.\r
\r
\r
\r
| Parameter | \r
Options | \r
Recommendation for Baking | \r
\r
\r
\r
\r
| Curing method | \r
Platinum (addition) / Peroxide / Tin (condensation) | \r
Platinum \u2014 purest, no odor, no byproducts, LFGB-eligible | \r
\r
\r
| Durometer | \r
20\u201380 Shore A | \r
40\u201360 Shore A (flexible yet self-supporting) | \r
\r
\r
| Base polymer | \r
Virgin PDMS / Recycled blend | \r
100% virgin (Dow, Wacker, Shin-Etsu, Momentive) | \r
\r
\r
| Color | \r
Any Pantone match | \r
Confirm pigment is food-contact approved (iron oxide, titanium dioxide) | \r
\r
\r
| Filler loading | \r
0\u201340% calcium carbonate | \r
Maximum 10% (higher loading = white stress marks, reduced elasticity) | \r
\r
\r
| Post-cure | \r
4 hours @ 200\u00b0C (standard) | \r
Mandatory \u2014 removes residual volatiles; non-negotiable for LFGB | \r
\r
\r
| Certification | \r
FDA / LFGB / EU 1935/2004 / SGS | \r
LFGB + FDA dual certification for EU + US market coverage | \r
\r
\r
\r
Why platinum-cured silicone is worth the premium:\r
\r
- No acidic decomposition byproducts (peroxide curing leaves trace acids that cause odor)
\r
- Superior long-term stability \u2014 no yellowing or embrittlement over 5+ years
\r
- Passes LFGB VOC and organotin testing (peroxide-cured may fail VOC limits)
\r
- Higher tear strength \u2014 critical for molds with thin walls or intricate detail
\r
- Cost premium: only 15\u201325% over peroxide-cured at production volume
\r
\r
For a comprehensive safety and certification breakdown \u2014 including the specific test methods, migration limits, and how to verify a supplier\u2019s certificate \u2014 see our
food-grade silicone certification guide (FDA, LFGB & SGS compared).\r
How Does the Production Process Work?
\r
Understanding the production workflow helps you set realistic timelines, identify quality checkpoints, and communicate effectively with your manufacturer.\r
\r
Production stages (compression molding):\r
\r
- Silicone compounding \u2014 Base polymer + curing agent + pigment + additives mixed on a two-roll mill. Batch traceability recorded (lot number, date, operator).
\r
- Pre-form cutting \u2014 Mixed silicone sheet cut into precise weight charges for each cavity. Weight accuracy \u00b1 1g ensures uniform fill.
\r
- Compression molding \u2014 Charges placed in heated mold (150\u2013180\u00b0C); hydraulic press closes at 10\u201320 MPa for 60\u2013180 seconds. Silicone flows to fill all cavities.
\r
- Demolding \u2014 Press opens; parts removed manually or with air eject. Flash (excess material at parting line) trimmed.
\r
- Post-curing \u2014 Parts placed in convection oven at 200\u00b0C for 4 hours. Removes residual curing agents and volatiles. This step is mandatory for food-safety compliance.
\r
- Quality inspection \u2014 Visual (defects, color, flash), dimensional (calipers/CMM), functional (flex test, release test). AQL 2.5 sampling for bulk orders.
\r
- Packaging \u2014 Per specification: poly bag, retail box, blister, or bulk carton. Labeling per EU requirements (material ID, importer, max temperature).
\r
\r
Production capacity benchmarks:\r
\r
- Single-cavity mold: 200\u2013400 pieces per 8-hour shift
\r
- 12-cavity mold: 2,000\u20134,000 pieces per shift
\r
- Typical factory (20+ machines): 300,000\u2013800,000 pieces per month across all product lines
\r
\r
Prototyping and Sampling: Timeline, Costs, and What to Expect
\r
Prototyping bridges the gap between your CAD file and mass production. Budget for 2\u20133 sampling rounds \u2014 the first sample rarely matches expectations perfectly, and that is normal.\r
\r
\r
\r
| Stage | \r
Method | \r
Timeline | \r
Cost | \r
Purpose | \r
\r
\r
\r
\r
| Shape verification | \r
3D printing (SLA/SLS) | \r
3\u20135 days | \r
$50\u2013$150 | \r
Confirm dimensions, ergonomics, visual proportions | \r
\r
\r
| Material prototype | \r
Silicone hand sample (soft tooling) | \r
7\u201310 days | \r
$200\u2013$500 | \r
Test flexibility, demolding, food release in real silicone | \r
\r
\r
| T1 production sample | \r
CNC steel/aluminum mold | \r
15\u201325 days | \r
$500\u2013$2,000 (tooling) | \r
First articles from production-grade tooling; final validation | \r
\r
\r
| Revision (if needed) | \r
CNC re-machining | \r
5\u201310 days | \r
$100\u2013$300 | \r
Adjust dimensions, add/remove features, fix draft issues | \r
\r
\r
\r
Sampling best practices:\r
\r
- Request 3\u20135 T1 samples (not just 1) \u2014 test across multiple units for consistency
\r
- Test under real conditions: bake at target temperature, freeze, wash in dishwasher, flex 100+ times
\r
- Photograph and annotate any issues directly on the sample; send back to factory with marked corrections
\r
- Sign and date an approved \u201cgolden sample\u201d \u2014 this becomes the quality reference for all future production
\r
- Confirm in writing how many revision rounds are included before additional charges apply
\r
\r
Quality Control: What to Inspect Before Shipping
\r
Quality control is not a single checkpoint \u2014 it is a system spanning raw material intake through final packing. As the buyer, you should specify and verify the following:\r
\r
Incoming material control:\r
\r
- Silicone compound certificate of analysis (CoA) per batch: durometer, viscosity, curing profile
\r
- Pigment food-contact compliance documentation
\r
- Lot traceability: every production run linked to specific raw material batch numbers
\r
\r
In-process inspection:\r
\r
- First-article inspection (FAI): dimensions, weight, color, and function verified before bulk run continues
\r
- Hourly spot checks during production: visual defects, flash, short shots
\r
- Post-cure verification: confirm 4-hour/200\u00b0C cycle completed (affects LFGB compliance)
\r
\r
Pre-shipment inspection (AQL 2.5, Level II):\r
\r
\r
\r
| Defect Type | \r
Examples | \r
AQL Limit | \r
\r
\r
\r
\r
| Critical | \r
Contamination, sharp edges, missing certification marking | \r
0 (zero tolerance) | \r
\r
\r
| Major | \r
Dimensional out-of-spec, color mismatch, incomplete curing (tacky surface) | \r
2.5% | \r
\r
\r
| Minor | \r
Slight flash, minor surface blemish on non-functional area | \r
4.0% | \r
\r
\r
\r
Buyer\u2019s QC checklist before authorizing shipment:\r
\r
- Dimensional report (calipers or CMM) on 5\u201310 random samples per SKU
\r
- Hardness test (Shore A durometer) \u2014 must fall within \u00b15 of specified value
\r
- Tensile/tear strength test (if specified in PO)
\r
- Visual comparison against signed golden sample under standardized lighting (D65)
\r
- Functional test: bake/demold cycle on 3 samples; confirm clean release without greasing
\r
- Packaging verification: correct labeling, barcode scan, carton weight, drop test
\r
\r
You or a third-party QC firm (SGS, Bureau Veritas, T\u00d6V) should conduct this inspection. Cost: $150\u2013$300 per man-day. Never skip it for orders above $5,000 \u2014 the inspection cost is 1\u20132% of order value but prevents 100% loss from a rejected container.\r
How Do You Structure the Ordering and Commercial Terms?
\r
Clear commercial terms prevent disputes and ensure both parties have aligned expectations. Here is the standard framework for custom silicone mold orders:\r
\r
\r
\r
| Term | \r
Standard Practice | \r
Negotiation Leverage | \r
\r
\r
\r
\r
| Tooling cost | \r
$500\u2013$3,000 per design (paid upfront) | \r
Amortize over first 3 orders for volumes >10K | \r
\r
\r
| Tooling ownership | \r
Buyer owns (if paid); factory stores | \r
Include return/destruction clause in contract | \r
\r
\r
| Sample cost | \r
$100\u2013$300 per design (2\u20133 rounds) | \r
Credit against bulk order >20K units | \r
\r
\r
| MOQ | \r
3,000\u20135,000 pcs per design | \r
1,000\u20132,000 trial order at +15% unit price | \r
\r
\r
| Unit pricing | \r
Tiered: 5K / 10K / 50K breakpoints | \r
Lock pricing for 12 months with volume commitment | \r
\r
\r
| Payment | \r
30% deposit + 70% before shipping | \r
After 5 orders: 30/70 against B/L copy | \r
\r
\r
| Lead time | \r
25\u201335 days (tooling + production) | \r
Rush: 18\u201320 days at +10\u201315% surcharge | \r
\r
\r
| QC standard | \r
AQL 2.5 (Level II) | \r
Specify critical/major/minor defect definitions | \r
\r
\r
| Warranty | \r
Free replacement above agreed defect rate | \r
Written warranty clause; photo evidence process | \r
\r
\r
\r
For a detailed supplier evaluation framework and negotiation playbook, see our guide on
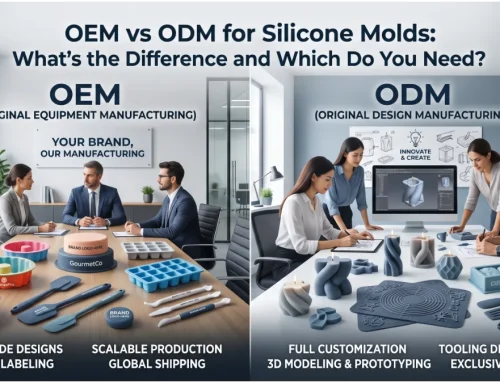
how to choose a silicone mold manufacturer. And for the OEM vs ODM decision framework, see our
complete OEM vs ODM guide.\r
How Do You Protect Your Design and Build Long-Term Value?
\r
A custom mold is an intellectual property asset. Protecting it requires contractual, legal, and operational safeguards \u2014 especially when manufacturing in China for sale in European markets.\r
\r
IP protection checklist:\r
\r
- NNN Agreement \u2014 Non-Disclosure, Non-Use, Non-Circumvention. Governed by Chinese law; specific liquidated damages clause ($50,000\u2013$200,000 per breach). Sign BEFORE sharing any design files.
\r
- Tooling ownership clause \u2014 Mold is buyer\u2019s exclusive property. Factory may not run, display, or reference the design for other clients. Mold returned or destroyed upon contract termination.
\r
- Design registration \u2014 File a Community Design (EU IPO, \u20ac350 for up to 7 designs) or Chinese design patent (CNIPA, ~$500) before sharing files. Gives legal standing for enforcement.
\r
- Production auditing \u2014 Require batch records showing quantities produced per purchase order. Unannounced factory visits (or third-party audits) verify no unauthorized production runs.
\r
- Trademark your product name \u2014 Register in both EU (EUIPO) and China (CNIPA) to prevent squatting and enable customs seizure of counterfeits.
\r
\r
Building long-term value from a custom mold portfolio:\r
\r
- Start with 3\u20135 hero SKUs that define your brand identity
\r
- Expand seasonally (Christmas, Easter, Halloween shapes) using the same factory relationship
\r
- Reinvest proven sellers into multi-cavity tooling (upgrade from 1-cavity to 12-cavity for 10x output)
\r
- License exclusive designs to distributors in non-competing geographies
\r
- Build a design library that compounds \u2014 each new mold strengthens your catalog\u2019s breadth and switching costs for buyers
\r
\r
What Are the Total Project Economics?
\r
Understanding the full cost picture helps you evaluate ROI and set appropriate retail pricing:\r
\r
\r
\r
| Cost Component | \r
Typical Range | \r
Notes | \r
\r
\r
\r
\r
| Design (if outsourced) | \r
$200\u2013$1,000 | \r
3D modeling + revisions; free if factory provides | \r
\r
\r
| Tooling | \r
$500\u2013$3,000 | \r
Per design; amortized over production volume | \r
\r
\r
| Sampling (2\u20133 rounds) | \r
$200\u2013$600 | \r
Often credited against bulk order | \r
\r
\r
| Unit cost (10K qty) | \r
$1.00\u2013$5.00 | \r
Depends on size, complexity, color, packaging | \r
\r
\r
| Certification testing | \r
$800\u2013$1,500 | \r
LFGB panel at accredited lab (one-time per compound) | \r
\r
\r
| Shipping (sea, per CBM) | \r
$80\u2013$150 | \r
FCL 20ft \u2248 28 CBM; silicone is lightweight/voluminous | \r
\r
\r
| EU import duty | \r
6.5% | \r
HS 3924.90; plus 19% VAT (Germany) | \r
\r
\r
\r
ROI example: A custom 20cm round cake mold at $2.50/unit (10K qty) + $1,500 tooling = $2.65 landed cost per unit (including freight/duty). Retail at \u20ac12.99 on Amazon.de \u2192 margin of approximately \u20ac8.50/unit after FBA fees. Tooling pays back within 176 units. At 500 units/month, the mold generates \u20ac4,250/month gross margin for 3+ years.\r
Frequently Asked Questions
\r
What is the minimum order quantity for a fully custom silicone mold design?
\r
Most direct factories require 3,000\u20135,000 pieces per design for fully custom (OEM) orders to economically justify the tooling investment. Some accept trial orders of 1,000\u20132,000 pieces at a 15\u201320% unit price premium. For ODM orders (factory\u2019s existing design with your branding), MOQs drop to 500\u20131,000 pieces since no new tooling is needed. The practical minimum is determined by tooling amortization: at $1,500 tooling cost, you need 3,000+ units to keep the per-unit tooling contribution below $0.50.\r
How long does a custom silicone mold project take from start to delivery in Europe?
\r
Total timeline is approximately 60\u201385 days: design and DFM review (5\u20137 days), tooling fabrication (7\u201315 days), sampling and approval (7\u201314 days including 1\u20132 revision rounds), bulk production (15\u201320 days), QC and packing (2\u20133 days), and sea freight to European ports (25\u201335 days). Rush options can compress production to 18\u201320 days at a surcharge. Air freight (5\u20137 days) is available for samples or urgent small orders at $5\u2013$8/kg.\r
Can I use one custom mold design for multiple products (baking, soap, candles)?
\r
Yes, with caveats. The same silicone mold can produce food items (cake, chocolate, ice) and non-food items (soap, candles, resin) \u2014 but you must use separate physical molds for food and non-food production to maintain food-safety certification. Cross-contamination from candle wax or resin residues would invalidate LFGB/FDA compliance. Many brands order the same design in two colorways: one certified food-grade batch for baking products and a separate batch (potentially lower-cost peroxide-cured) for craft applications.\r
What happens if my custom mold design doesn\u2019t sell? Can I modify the tooling?
\r
Minor modifications (adding a logo, changing text, adjusting a dimension by 1\u20132mm) can often be made to existing tooling via CNC re-machining at $100\u2013$300. Major redesigns (changing the overall shape, adding cavities, altering the parting line) require new tooling at full cost. To mitigate risk, validate demand with an ODM product first, then commission a custom design incorporating proven features. Some factories offer a \u201ctooling insurance\u201d arrangement: if your first order exceeds 20,000 units, they credit 50% of the tooling cost back.\r
How do I ensure consistent quality across repeat orders spanning months or years?
\r
Establish and document: (1) a signed quality specification sheet with dimensional tolerances, durometer range, color Pantone code, and acceptable defect limits; (2) a sealed \u201cgolden sample\u201d stored at both your location and the factory, used as the visual/tactile reference for every production run; (3) mandatory pre-shipment inspection (AQL 2.5) for every order, conducted by you or a third-party QC firm ($150\u2013$300 per inspection); (4) batch traceability records linking each shipment to specific raw material lots and production dates. Review defect trends quarterly \u2014 gradual quality drift is more common than sudden failure.\r
What file format do I need for custom silicone mold design?
\r
Send a STEP (.stp) file as your primary deliverable \u2014 it preserves exact solid geometry and is directly machinable by CNC programmers. Include a 2D PDF drawing with critical dimensions, tolerances (\u00b10.5mm standard), and material notes. Avoid STL files (mesh data, not parametric) and JPEG sketches as sole inputs. If you only have a physical sample or hand sketch, most factories offer a 3D scanning and modeling service for $100\u2013$300 with a 3\u20135 day turnaround.\r
How much does a custom silicone mold prototype cost?
\r
Expect $50\u2013$150 for a 3D-printed shape prototype (3\u20135 days), $200\u2013$500 for a silicone hand sample from soft tooling (7\u201310 days), and $500\u2013$2,000 for a T1 sample from production-grade CNC tooling (15\u201325 days). Most factories credit sample costs against your first bulk order above 10,000 units. Budget for 2\u20133 rounds total; the first sample rarely passes without minor corrections.\r
What is the typical tooling fee for a custom silicone mold?
\r
Tooling fees range from $500 for a simple single-cavity baking mold to $3,000+ for a multi-cavity (12\u201324 cavity) mold with fine detail or complex geometry. The fee covers CNC machining of steel or aluminum mold halves, EDM texturing if needed, and trial runs. You own the tooling if you pay the fee \u2014 always confirm ownership in writing. For high-volume products, investing in hardened steel tooling ($2,000\u2013$3,000) pays back through 500,000+ cycle life versus aluminum ($500\u2013$1,000) at 50,000\u2013100,000 cycles.\r
Related resources: Custom Cake Box – Bread & Pastry Baking Packaging Box (Food-Grade), Baking Accessories collection, full product catalog.