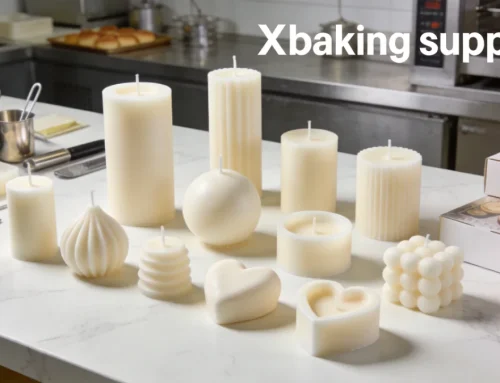
How to Make Candles with Silicone Molds: A Step-by-Step Production Guide
Making candles with silicone molds requires three core materials — wax (soy or paraffin), a wick, and a platinum-cured silicone mold rated to 230 °C — and follows a 6-step process from melting to demolding that takes 4–24 hours per batch depending on candle size. Silicone molds have become the standard tool for small-batch and commercial candle production because they release complex shapes cleanly, require no release agents, and survive 1,000+ pour cycles without degradation.
This guide is written for B2B audiences: candle brands scaling production, craft workshop operators, corporate gift manufacturers, and distributors who need to understand the production process to evaluate mold quality and advise their customers. Whether you produce 50 candles per week or 5,000, the fundamentals are the same — only the equipment scale changes.
Step 1: Select Your Wax and Calculate Quantities
The wax type determines pour temperature, cure time, scent throw, and finished appearance. The three most common options for molded candles:
| Wax Type | Pour Temperature | Cure Time | Best For | Cost (per kg) |
|---|---|---|---|---|
| Soy wax (natural) | 55–65 °C | 24–48 hours | Eco brands, container-free pillars | $3.00–$5.00 |
| Paraffin (standard) | 70–80 °C | 4–12 hours | High-detail shapes, vibrant colors | $1.50–$3.00 |
| Beeswax (premium) | 75–85 °C | 12–24 hours | Luxury/natural market, golden color | $8.00–$15.00 |
| Coconut-soy blend | 60–70 °C | 24 hours | Strong scent throw, smooth finish | $4.00–$7.00 |
Quantity calculation: Measure your mold’s water capacity (fill with water, pour into a measuring jug). Multiply by 0.9 to get the wax weight in grams (wax is approximately 10% less dense than water). Add 10% extra for melt pot residue and top-up pours. Example: a mold holding 200 ml water needs approximately 180 g wax per candle, plus 18 g buffer = 198 g per unit.
For silicone molds specifically: all common candle waxes are fully compatible. Soy, paraffin, beeswax, and blends pour at 55–85 °C — well within silicone’s 230 °C rating. No release agent is needed; the wax contracts slightly as it cools, naturally pulling away from the silicone surface.
Step 2: Prepare the Mold and Wick
Wick selection. Match wick thickness to candle diameter: 2 mm wick for candles up to 50 mm diameter, 3 mm for 50–70 mm, 4 mm for 70–90 mm. For shaped/novelty candles (spheres, animals, geometric), use a slightly thinner wick than the diameter suggests — irregular shapes create uneven melt pools, and an oversized wick causes tunneling.
Wick placement. Thread the wick through the mold’s wick hole (if present) or through a small hole you pierce at the base center. Secure with a wick bar, pencil, or dedicated wick holder laid across the mold opening. The wick must be perfectly vertical — a leaning wick produces an asymmetric burn that melts through one side of the candle.
Mold preparation. Silicone molds require no greasing or release spray for candle making. Simply ensure the mold is clean and dry. For brand-new molds, a single warm-water rinse removes any manufacturing residue. For intricate multi-part molds (two-piece spheres, hinged shapes), align the halves and secure with the integrated clips or rubber bands before pouring.
For a comprehensive guide to selecting the right silicone candle mold (shapes, sizes, durometer, multi-part vs single-piece), see our candle silicone molds wholesale guide.
Step 3: Melt and Prepare the Wax
Melting method. Use a double boiler (bain-marie) or a dedicated wax melter with thermostat control. Never melt wax directly over a flame — paraffin flash point is approximately 200 °C, and uncontrolled heating creates a fire hazard. For production batches above 5 kg, an electric wax melter with a pour spout and digital temperature control ($80–$200) pays for itself in consistency and safety.
Temperature targets. Heat wax to 10–15 °C above your pour temperature to ensure complete melting, then cool to the target pour temperature before adding fragrance/color. Example for soy wax: heat to 75 °C (full melt), cool to 60 °C, add fragrance oil (6–10% by weight), stir gently for 2 minutes, then pour at 55–60 °C.
Adding color. Use candle-specific dye blocks or liquid dye (not food coloring — it is water-based and will not disperse in wax). Add dye at the pour temperature and stir until fully dissolved. For silicone molds, slightly deeper color saturation is recommended because the matte silicone surface produces a slightly muted finish compared to glossy metal molds.
Adding fragrance. Fragrance oil load: 6–10% of wax weight (check your fragrance supplier’s maximum recommended load). Stir gently — vigorous stirring introduces air bubbles that create surface pitting on the finished candle. Add fragrance at the pour temperature (not at full melt temperature) to minimize flash-off of volatile top notes.
Step 4: Pour the Wax
Pour technique. Pour slowly and steadily in a thin stream, aiming for the mold wall rather than directly onto the wick. This minimizes air bubble formation. For deep molds (pillars over 100 mm tall), pour in two stages: fill to 70%, wait 2 minutes for the first layer to set slightly, then top up. This reduces shrinkage voids at the base.
Avoiding bubbles. The three main causes of surface bubbles in silicone molds: pouring too fast (traps air), pouring too hot (creates convection currents), and moisture in the mold (steam). Prevention: pour at the correct temperature, pour slowly along the wall, and ensure molds are completely dry. For production environments, a brief pass with a heat gun (5 seconds, 15 cm distance) over the surface immediately after popping eliminates micro-bubbles.
Multi-color / layered pours. For layered candles, pour the first color, allow it to form a skin (15–30 minutes for paraffin, 1–2 hours for soy), then pour the second color at a slightly higher temperature (5 °C above normal) to create a bond between layers. If the first layer is fully cured, score it lightly with a toothpick before the second pour to create a mechanical bond.
Step 5: Cool and Cure
Cooling environment. Room temperature (20–22 °C), away from drafts and direct sunlight. Uneven cooling causes cracking, sinkholes, and frosting (white crystalline patches on soy wax). Do not refrigerate or freeze candles to speed curing — thermal shock cracks the wax and can warp thin silicone mold walls.
Cure times by wax: Paraffin: 4–12 hours to demold, 24–48 hours to fully cure. Soy: 12–24 hours to demold, 48–72 hours full cure (soy is softer and needs longer). Beeswax: 8–16 hours to demold, 24 hours full cure.
Shrinkage management. All waxes shrink as they cool (paraffin ~5%, soy ~3%, beeswax ~4%). This creates a depression around the wick at the top. Reserve 10% of your melted wax for a “top-up pour” — a second small pour to fill the shrinkage void after the initial set. For silicone molds, the flexibility allows you to gently press the mold walls inward during cooling to minimize the void size.
Step 6: Demold and Finish
Demolding technique. Once fully set, gently peel the silicone mold away from the candle. Start at the top edge and roll the mold downward/outward like removing a sock. For rigid shapes (spheres, cubes), flex the mold base upward to break the vacuum seal, then ease the candle out. Silicone’s flexibility makes this straightforward — no tapping, freezing, or hot-water baths required (unlike metal or rigid plastic molds).
Finishing. Trim the wick to 10–12 mm above the candle surface. Smooth any seam lines (from multi-part molds) with a warm metal spatula or your fingertip (body heat is sufficient for soy). For a professional finish, briefly pass the candle surface with a heat gun at 20 cm distance — this melts the outer 0.5 mm, eliminating fingerprints and minor imperfections for a glossy finish.
Quality check. Inspect for: surface smoothness (no pits or bubbles), color uniformity, wick centrality (±2 mm tolerance), base flatness (candle stands without rocking), and scent throw (fragrance detectable at 30 cm without burning). Reject rate for experienced producers: below 3%.
Scaling Production: From 50 to 5,000 Candles per Week
For B2B buyers evaluating silicone molds for commercial candle production, here is how the process scales:
50–200/week (artisan). Single-cavity molds, hand-poured, kitchen-scale equipment. 10–20 molds in rotation. Labor: 1 person, 15–20 hours/week. Mold investment: $200–$500.
500–1,000/week (small commercial). Multi-cavity molds (4–6 cavities per tray), dedicated melt tank (20 L), pouring jug with thermometer. 30–50 molds in rotation. Labor: 2–3 people, 40 hours/week. Mold investment: $1,000–$3,000.
2,000–5,000/week (factory). Custom multi-cavity production molds (8–16 cavities), automated wax melter with pump-pour system, cooling racks, dedicated demolding station. Labor: 4–6 people per shift. Mold investment: $5,000–$15,000 (custom tooling). For custom production mold design and MOQ details, see our MOQ and lead time guide.
FAQ: Candle Making with Silicone Molds
Do silicone candle molds need a release spray?
No. Silicone’s inherently low surface energy (20–24 mN/m) allows candle wax to release cleanly without any release agent, oil, or spray. Wax contracts as it cools, naturally separating from the mold surface. Adding release spray is counterproductive — it creates a residue film that dulls the candle surface and builds up in the mold over time, requiring frequent cleaning.
What size silicone mold do I need for a standard pillar candle?
A standard pillar candle is 70 mm diameter × 100–150 mm tall, using approximately 350–500 g of wax. The corresponding silicone mold should have an internal cavity of 72 mm diameter × 105–155 mm height (adding 2–5 mm for wax contraction clearance). Use a 3 mm wick for this diameter. For tapered pillars (wider at base), specify the base and top diameters separately when ordering custom molds.
How many candles can one silicone mold produce before wearing out?
A quality platinum-cured silicone candle mold (Shore A 50–60) produces 1,000–2,000 candles before showing wear. The primary failure mode is surface abrasion from demolding tools (metal tweezers, knives used to trim wicks) — always use silicone or wooden tools near the mold interior. With proper care (hand-wash only, no abrasive cleaners, store flat), premium molds reach 2,000+ cycles. For the material science behind silicone durability, see our silicone material safety guide.
Share This Story, Choose Your Platform!
Related posts